Object Relational Mapping
Creating Records
Reading Records
Updating Records
Deleting Records
Column Statistics
Dynamic Finders
Getting Paginated Data
Associations
Nested Properties
Object Validation
Object Callbacks
Calculated Properties
Transactions
Dirty Records
Soft Delete
Automatic Time Stamps
Using Multiple Data Sources
description: Install Wheels and get a local development server running
Getting Started
By far the quickest way to get started with Wheels is via CommandBox. CommandBox brings a whole host of command line capabilities to the CFML developer. It allows you to write scripts that can be executed at the command line written entirely in CFML. It allows you to start a CFML server from any directory on your machine and wire up the code in that directory as the web root of the server. What's more is, those servers can be either Lucee servers or Adobe ColdFusion servers. You can even specify what version of each server to launch. Lastly, CommandBox is a package manager for CFML. That means you can take some CFML code and package it up into a module, host it on ForgeBox.io, and make it available to other CFML developers. In fact we make extensive use of these capabilities to distribute Wheels plugins and templates. More on that later.
One module that we have created is a module that extends CommandBox itself with commands and features specific to the Wheels framework. The Wheels CLI module for CommandBox is modeled after the Ruby on Rails CLI module and gives similar capabilities to the Wheels developer.
Install CommandBox
The first step is to get CommandBox downloaded and running. CommandBox is available for Windows, Mac & Linux, and can be installed manually or using one of the respective package managers for each OS. You can use Chocolatey on Windows, Homebrew on MacOS, or Yum/Apt on Linux depending on your flavor of Linux. Please follow the instructions on how to install CommandBox on your particular operating system. At the end of the installation process you want to make sure the box command is part of your system path so you can call the command from any directory on your system.
Once installed, you can either double-click on the box executable which opens the CommandBox shell window, or run box from a CMD window in Windows, Terminal window in MacOS, or shell prompt on a Linux server. Sometimes you only want to call a single CommandBox command and don't need to launch a whole CommandBox shell window to do that, for these instances you can call the CommandBox command directly from your default system terminal window by prefixing the command with the box prefix.
So to run the CommandBox version command you could run box version from the shell or you could launch the CommandBox shell and run version inside it.
{% tabs %} {% tab title="Shell" %} box version {% endtab %}
{% tab title="CommandBox" %} version {% endtab %} {% endtabs %}
This is a good concept to grasp, cause depending on your workflow, you may find it easier to do one versus the other. Most of the commands you will see in these CLI guides will assume that you are entering the command in the actual CommandBox shell so the box prefix is left off.
Install the wheels-cli CommandBox Module
Okay, now that we have CommandBox installed, let's add the Wheels CLI module.
{% tabs %} {% tab title="CommandBox" %} install wheels-cli {% endtab %} {% endtabs %}
Installing this module will add a number of commands to your default CommandBox installation. All of these commands are prefixed by the wheels name space. There are commands to create a brand new Wheels application or scaffold out sections of your application. We'll see some of these commands in action momentarily.
Start a new Application using the Wizard
To install a new application using version 3.0, we can use the new application wizard and select Bleeding Edge when prompted to select the template to use.
{% tabs %} {% tab title="CommandBox" %} wheels new {% endtab %} {% endtabs %}
Start a New Application Using the Command Line
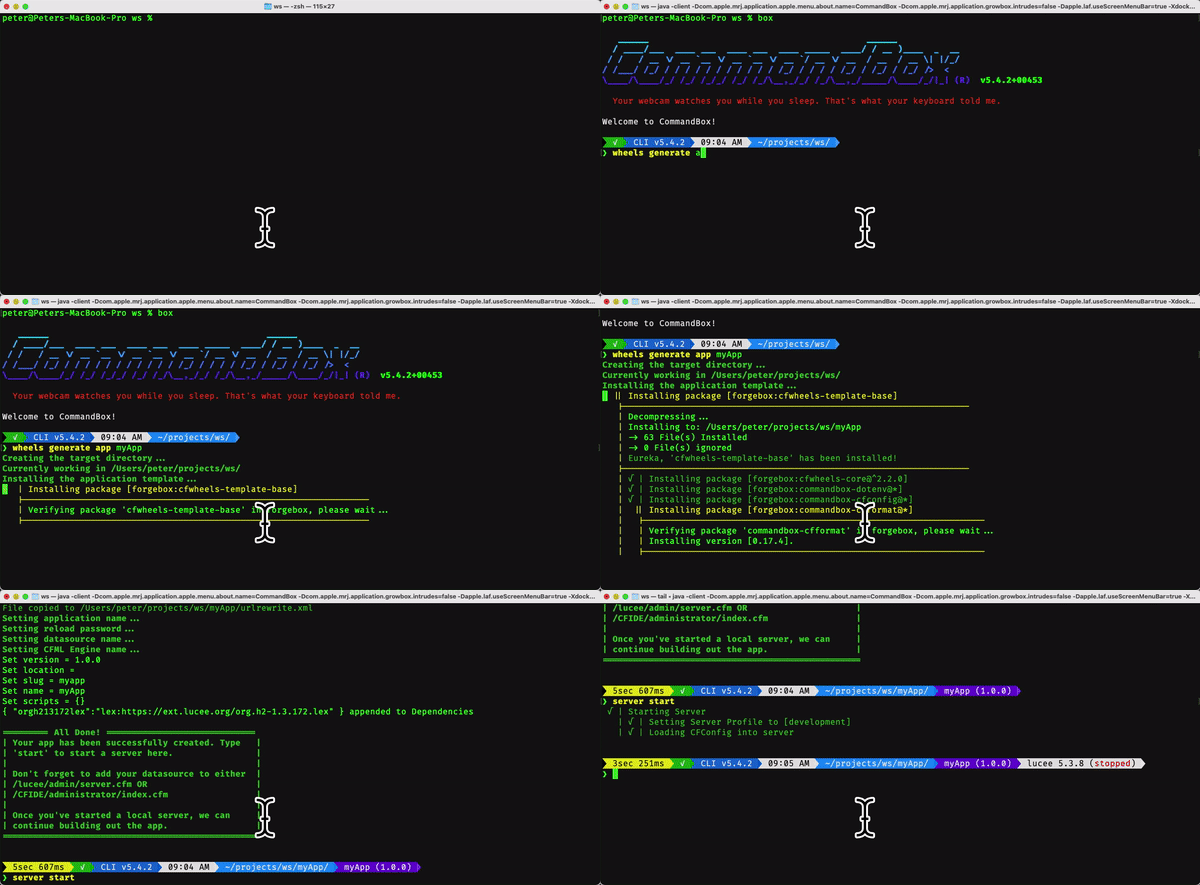
Now that we have CommandBox installed and extended it with the Wheels CLI module, let's start our first Wheels app from the command line. We'll look at the simplest method for creating a Wheels app and starting our development server.
{% tabs %}
{% tab title="CommandBox" %}
wheels generate app myApp
server start
{% endtab %}
{% endtabs %}

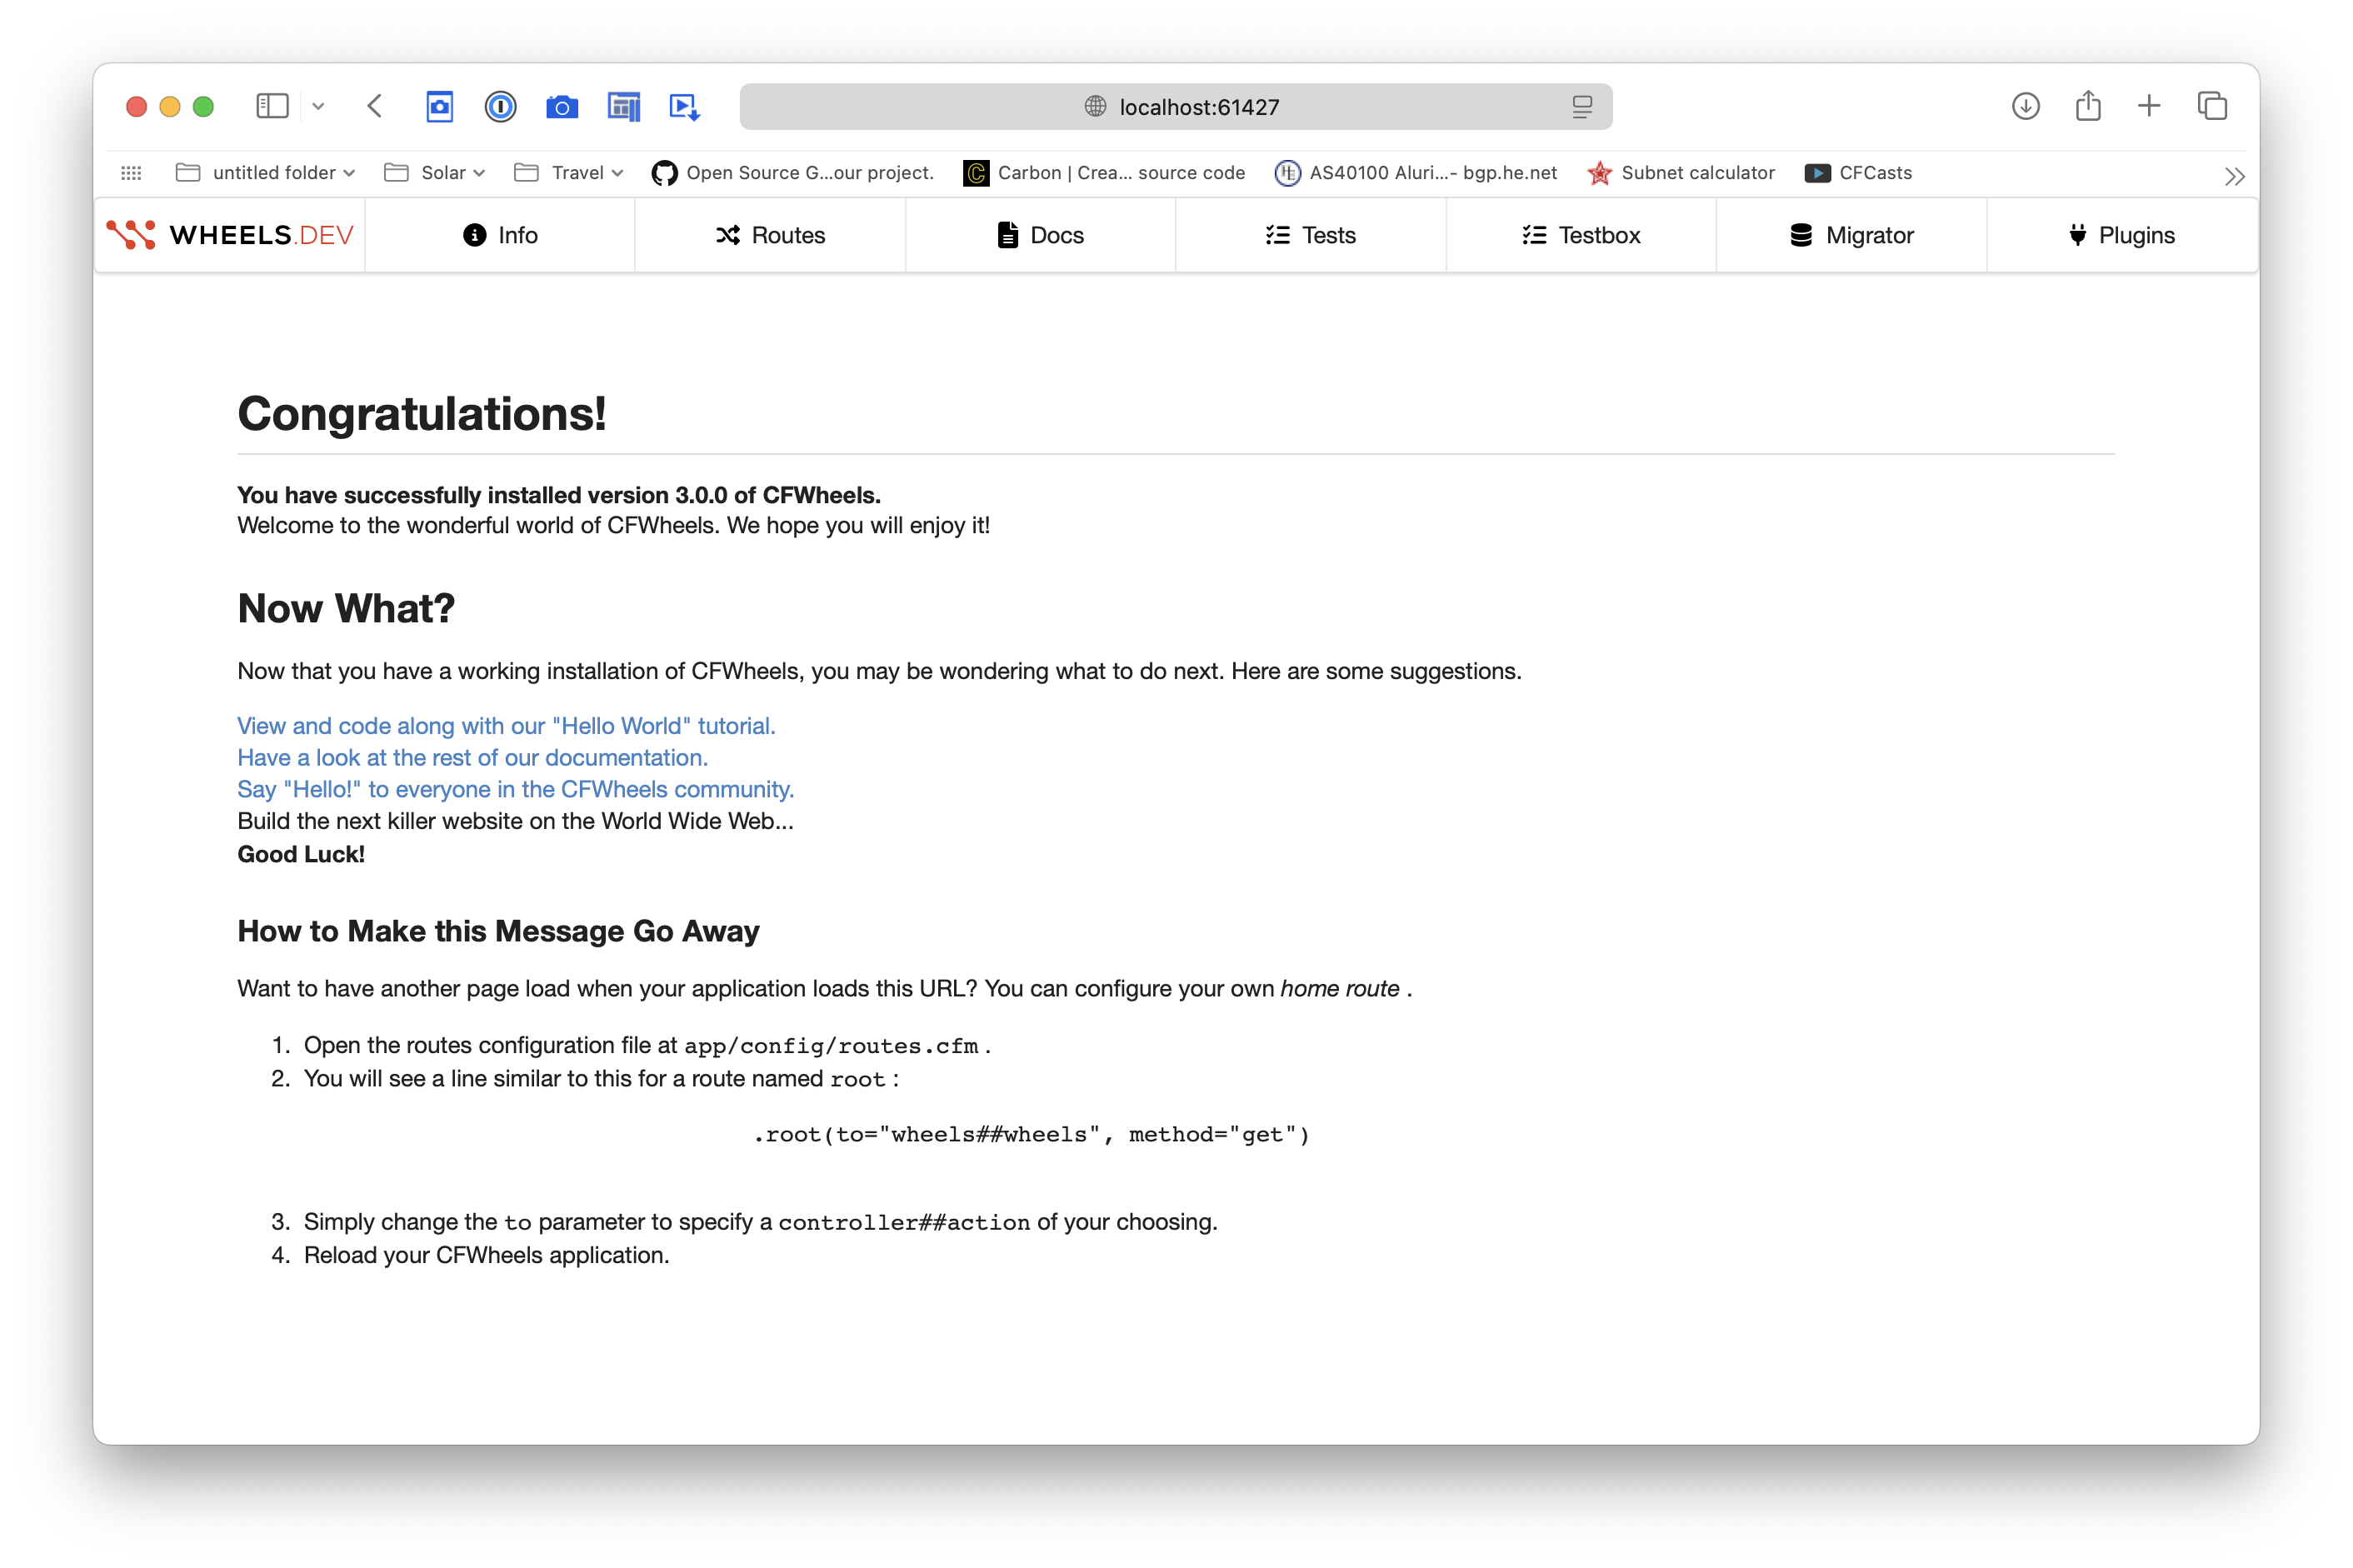
A few minutes after submitting the above commands a new browser window should open up and display the default Wheels congratulations screen.

So what just happened? Since we only passed the application name myApp to the wheels generate app command, it used default values for most of its parameters and downloaded our Base template (wheels-base-template) from ForgeBox.io, then downloaded the framework core files (wheels.dev) from ForgeBox.io and placed it in the vendor/wheels directory, then configured the application name and reload password, and started a Lucee server on a random port.
{% hint style="info" %} A Word About Command Aliases
CommandBox commands have the capability to be called by multiple names or aliases. The command above wheels generate app can also be initiated by typing wheels g app. In fact g is an alias for generate so wherever you see a command in the CLI documentation that has generate in it you can substitute g instead.
In addition to shortening generate to g, aliases can completely change the name space as well. A command that you haven't seen yet is the wheels generate app-wizard command. This command guides the user through a series of menu options, building up all the parameters needed to customize the start of a new Wheels project. You're likely to use the wizard when starting a new Wheels application so it's good to become familiar with it.
This command has the normal alias referenced above at wheels g app-wizard but it also has an additional alias at wheels new which is the command more prevalent in the Rails community. So the three commands wheels generate app-wizard, wheels g app-wizard, and wheels new all call the same functionality which guides the user though a set of menus, collecting details on how to configure the desired app. Once all the parameters have been gathered, this command actually calls the wheels generate app command to create the actual Wheels application.
{% endhint %}
This Getting Started guide has taken you from the very beginning and gotten you to the point where you can go into any empty directory on your local development machine and start a Wheels project by issuing a couple of CLI commands. In later guides we'll explore these options further and see what else the CLI can do for us.